Golden Pineapple Tarts a.k.a ‘Golf Ball’ Tarts
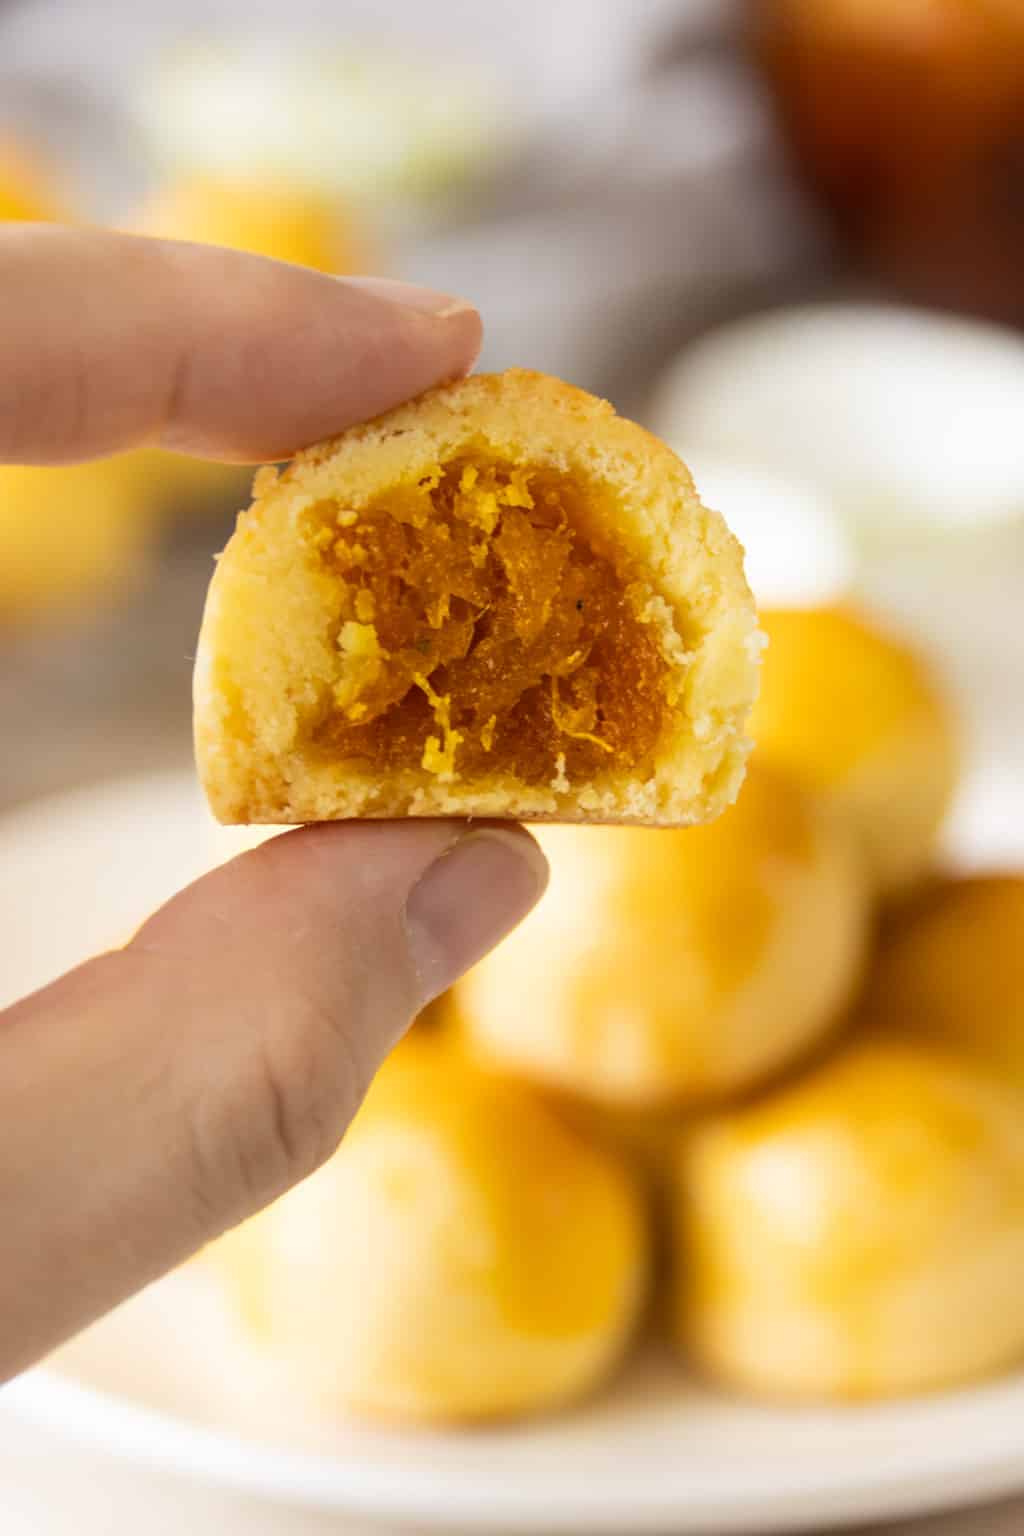
These pineapple tarts have an ultra buttery, melt-in-the-mouth pastry crumb that gives way to a sweet and tangy, delicious pineapple jam filling. The pastry comes together easily – no creaming needed!
I couldn’t wait to bake these extra buttery, melt-in-the-mouth pineapple tarts this year and share the results with you.
This is a long-awaited recipe update, and one that I hope will please all our pineapple tart fans out there! Yes, I mean YOU😃.

Table of contents
Why these pineapple tarts are so delicious
- Ultra buttery! So, if you don’t know it yet, I love buttery, buttery pastry. And this pastry gives you that rich, sweet buttery flavour in every tart!
- Tender, melt-in-the-mouth crumb. Biting into these pineapple tarts are going to be like love at first bite. And let me warn you, they’re highly addictive! One of my top goals in this recipe update was to make a shortcrust pastry that’s tender and more melty!
- Super easy pastry dough. This shortcrust pastry comes together quickly in a bowl – there’s no creaming of butter and sugar required.

Save for Later:Golden Pineapple Tarts
Pin this on PinterestCan I make pineapple tarts in advance?
We all know how immensely satisfying and delicious homemade pineapple tarts are. It goes without saying that it takes quite a bit of work, and a few hours at a stretch.
But it’s all so worth it when you see how much these are appreciated by your family and friends. Their enjoyment and compliments will make you want to do it every year!
If you’d like to make these ahead of time, here are a couple of suggestions to make your life easier and as hassle-free as possible.
- If you plan to cook your own pineapple jam (which I highly recommend 👍), this can be done a day or two in advance. When well stored, homemade pineapple jam will keep in the chiller for up to three weeks, and in the freezer for up to a year.
- Likewise, the pastry dough can also be made ahead and kept chilled for up to 3 days. This pastry dough also freezes very well. If frozen, let it thaw in the chiller the night before, before dividing, filling and shaping into tarts.
Ingredients for pineapple tarts
- Pineapple jam (store-bought or homemade). I always make my own pineapple jam, because there’s just so much more flavour and authenticity from cooking your own jam. Not to mention, you can make it less sweet. I’ve got you covered if you’re looking to make your own pineapple jam from scratch here, and I promise, it’s less hassle than you might think.
- Cake flour. Cake flour has a lower protein content than all-purpose flour and makes a more tender pastry.
- Corn flour or corn starch. Adding corn flour also makes the pastry more tender, and contributes to the melt-in-the-mouth factor.
- Butter, chilled. Salted or unsalted is fine, but be sure to use chilled butter and preferably, a premium quality butter like Danish butter. Rubbing cold butter in with flour is what makes the pastry more flaky, less tough. I recommend using salted butter, as salt accentuates the buttery taste. If you use unsalted butter, be sure to add fine salt (as suggested in the recipe card).
- Confectioner’s sugar (icing sugar). Confectioner’s sugar is finely ground sugar with a little added corn starch. Unlike regular sugar, the powdered texture of confectioner’s sugar gives this pastry a fine crumb.
- Milk powder. Milk powder adds colour and flavour to the pastry. I use full-fat milk powder.
- Egg yolk. I use yolks from large eggs.
- Vanilla extract. A little vanilla extract adds a lovely sweetness and warm flavour to the pastry. Try to use pure vanilla extract, wherever possible, as it has a much deeper flavour than the artificial essence.
- Salt. Add salt if you use unsalted butter. Use fine salt, as it distributes more evenly throughout the flour mixture.
- Yellow food colouring (optional). We eat with our eyes, after all. Adding a few drops of food colour makes for a beautiful golden pastry when baked. But don’t go overboard.
Step-by-step: How to make pineapple tarts
Prepare the pineapple jam filling
Roll the pineapple jam into balls, each weighing 10 g. Cover loosely with clingwrap and let the jam sit in the chiller while you make the pastry dough.

Make the shortcrust pastry dough
- Step 1: Sift together cake flour, corn flour, confectioner’s sugar, milk powder and salt (only add salt if you’re using unsalted butter).
- Step 2: With your fingertips, rub chilled butter cubes into the flour mixture until the mixture resembles coarse breadcrumbs. While rubbing, keep lifting the flour well up in the bowl. This allows air in between and prevents the butter from softening too much.
- Step 3: Add the yolks, vanilla extract and yellow food colour (optional). Tip: If you do add food colour, mix it in with the yolks before adding to the butter breadcrumbs.
- Step 4: Start by using a fork or flexible scraper to mix in the yolks.
- Step 5: Finish up by hand, mixing lightly until you get a soft and smooth dough. Be careful not to overwork the dough.
- Step 6: Roll the dough into balls, each weighing 15 g. Then chill for 10 mins before filling.


Fill and shape golf ball pineapple tarts
- Flatten a ball of dough between your palms. Place a ball of pineapple jam filling in the centre.
- Enclose the jam. Gently press the pastry around to patch up places where it’s too thin or where the jam isn’t fully enclosed.
- Gently roll the enclosed tart between your palms to smoothen and shape into a golf ball.
- Place on a baking tray lined with baking paper, spacing the tarts an inch (2-cm) apart.


Chill pineapple tarts before baking
- Place the tray in the chiller for 10 to 15 minutes, before baking. Note: If you don’t have room in your chiller to put in the tray, you can place the tarts close together on a large dish plate, and chill. Once chilled, the tarts will be firm to handle and it will be easy to transfer to the baking tray.
- Meanwhile, this would be a good time to start preheating the oven to 150°C (302°F). Have an oven rack placed in the centre of the oven.
Bake the tarts!


- Brush the tops of the tarts with egg wash. Bake in the centre of the pre-heated oven for 20 to 25 minutes.
- Half-way through the baking time, take the tray out of the oven and brush the tarts with a second layer of egg wash.
- Once the tops and base of the tarts have browned nicely, the tarts are done. This may take about 25 minutes, depending on your oven. Note: As the tarts bake, it is normal for cracks to appear. This is because the jam expands as it gets heated. Once the tarts cool, the cracks will shrink.
- Let the baked tarts cool on the tray for 5 minutes. Then, transfer to a wire rack to cool completely.


How to store pineapple tarts
Once completely cooled, store the pineapple tarts in an air-tight container (preferably with a few sachets of food-grade oxygen absorbers) and seal tightly. The tarts will keep well for up to 3 weeks in a cool, dry area. Please note that the tart shell will soften slightly because of the moist jam filling, but will retain a tender, melt-in-the-mouth biscuit texture.
Tip! To get the tarts crisp like fresh-baked, make sure the tarts come to room temperature and re-heat them in a warm oven (120°C/248°F) for 10 to 15 minutes. This temperature is just hot enough to remove the excess moisture and crisp up the tart shells without drying them out.
If you wish to make these tarts well ahead of time and need to keep them for longer than 2 to 3 weeks, chill the tarts in air-tight containers. When chilled, the tarts can keep well for up to 3 months.
Frequently asked questions
Based on a 15 g pastry dough and 12 g pineapple jam filling, this pastry dough can make about 40 large golf ball tarts.
For smaller golf ball tarts, I recommend a 10 – 12 g pastry dough and 8 – 10 g jam filling, which makes about 50 tarts.
No matter how crisp the tarts are fresh out of the oven, they will soften slightly with time. This is commonly the case when you have a moist filling like pineapple jam, especially if you use homemade pineapple jam.
However, the tart pastry will retain a tender, melt-in-the-mouth biscuit texture.
Unlike commercially produced pineapple paste which conform to strict production processes to ensure specific texture, moisture and consistency, homemade pineapple jam is more variable.
If your home-cooked pineapple jam has too much moisture, the tart shells will absorb some of that moisture and soften. This is generally not a problem, but if the pineapple jam filling has too much moisture (more on that below), you may run the risk of the tarts developing mould.
Here’s my top tip for crisp tarts! To get the tarts crisp like fresh-baked, make sure the tarts come to room temperature and re-heat them in a warm oven (120°C/248°F) for 10 to 15 minutes. This temperature is just hot enough to remove the excess moisture and crisp up the tart shells without drying them out.
Unlike commercially produced pineapple pastes which meet highly controlled formulations on texture, moisture and consistency, homemade pineapple jam is subject to more variability.
If your home-cooked pineapple jam wasn’t cooked dry enough, the tart shells will absorb some of that excess moisture and run the risk of turning mouldy.
Unfortunately, once the tarts turn mouldy, there is nothing you can do and you have to throw out the affected tarts. The good news is that you don’t need to throw out the whole batch if only a few have gone bad.
To prevent this, immediately re-heat the un-affected pineapple tarts in a moderately hot oven preheated to 120°C/248°F for 10 to 15 minutes to bake off the excess moisture.
Be aware this may not necessarily prevent the issue from happening again, as the problem has to do more with a pineapple filling that’s too moist and not the pastry dough itself.
This is a tender, melt-in-the-mouth tart pastry which is not quite suitable for open-faced pineapple tarts or pineapple roll tarts as it will be too soft to work with.
Pineapple tart pastry is a shortcrust pastry or biscuit pastry with a high fat content (from butter). As with pie pastry, chilling helps the butter in the dough firm up, allowing the filled pineapple tarts to hold their shape better during the baking process.
Also, chilling gets the butter into a nice, cold form so that it melts immediately in a hot oven. This allows the tarts to bake up flaky and crisp. Letting the dough sit at room temperature (especially in a warm environment like our tropics) for too long will cause some of the butter to melt and release water prematurely before it hits the oven.
Please note that you will need to add a few minutes of baking time when baking tarts that have had a good chill.
Oil gives the tarts a glossier sheen when baked, while condensed milk renders a deeper brown due to its sugar content. However, you will not even taste the sweetness or flavour of the condensed milk.
If you prefer, you can use a simple egg wash made with 2 egg yolks, 1 tsp of water, and a few drops of yellow food colour (optional).
Hope you’ll enjoy these as much as we do! Happy baking and stay safe, everyone – ? Celia
P.s. If you tried my previous pastry dough (before this update), please let me know and I’ll be happy to send you the recipe.

Here are more sweet treats you might enjoy:
Tried this recipe? I’d love to see! Remember to share your pics on Instagram and tag @foodelicacy or #foodelicacy.

Ingredients
For the filling:
- 500 g pineapple jam store-bought or homecooked
For the pastry dough:
- 240 g cake flour
- 30 g corn flour
- 50 g confectioner’s sugar
- 36 g milk powder preferably full-fat
- ½ tsp fine salt omit if using salted butter
- 200 g salted butter chilled
- 2 egg yolks
- ½ tsp vanilla extract
- Few drops of yellow food colour optional
For egg wash:
- 2 egg yolks
- 2 tsp water
- 2 tsp oil
- 2 tsp condensed milk
Instructions
Prepare the pineapple jam filling:
- Roll the pineapple jam into balls, each weighing 10 g. Cover loosely with clingwrap and let these sit in the chiller while making the pastry dough.
Make the pastry dough:
- Sift together cake flour, corn flour, confectioner’s sugar, milk powder and salt (omit if using salted butter). Set aside.
- Cut the chilled butter into cubes. Place in a large mixing bowl. With your fingertips, rub butter cubes into the flour mixture until the mixture resembles coarse breadcrumbs. While rubbing, keep lifting the flour well up in the bowl. This allows air in between and prevents the butter from softening too much.
- Add the yolks, vanilla extract and yellow food colour (optional). Cut into the butter-flour mixture with a fork or flexible scraper. Finish up by hand, mixing lightly until the mixture comes together into a soft and smooth dough.
- Roll the dough into balls, each weighing 15 g. Chill for 10 mins before filling.
Fill and shape the pineapple tarts:
- Flatten a ball of dough between your palms.
- Place a ball of pineapple jam filling in the centre. Enclose the filling, and gently roll between your palms to smoothen and shape into a golf ball tart.
- Place on a baking tray lined with baking paper, spacing the tarts an inch (2-cm) apart.
- Place the tray in the chiller for 10 to 15 minutes, before baking. (Note: If you don’t have room in your chiller to put in a tray, you can place the tarts close together on a large dish plate, and chill. Once chilled, the tarts will be firm to handle. Transfer to the prepared baking tray, spacing them apart.)
- Meanwhile, preheat the oven to 150°C (302°F).
Brush with egg wash and bake:
- Brush the tops of the tarts with egg wash.
- Bake in the centre of the pre-heated oven for 20 to 25 minutes. Half-way through the baking time, take the tray out of the oven and brush the tarts with a second layer of egg wash.
- Bake until the tops are golden brown, and the base of the tarts start to lightly brown, about 25 – 30 minutes. Note: Chilled tarts may take 5 mins longer. As the tarts bake, it is normal for cracks to appear. Do not be alarmed. This is due to the jam expanding outwards as it gets heated. Once the tarts cool, the cracks will shrink.
- Let baked tarts cool on the tray for 5 minutes. Then, transfer to a wire rack to cool completely.
How to store pineapple tarts:
- Once completely cooled, store in an air-tight container and seal tightly. The tarts will keep well for up to 3 weeks in a cool, dry area. If stored in the chiller, it will keep well for up to 3 months.


Thank you for such a beautiful recipe and clear instructions. This is my 2nd round after a huge success but the rolling out and wrap took like 2hours than 30mins the first time , and the 2nd time was 1 and 1/4hour. And I used plain flour than cake flour
Thank you for the recipe! My family and friends loved it! Made the pineapple jam from scratch and it was even better! 🙂
Hi Celia, is it possible to omit the second wash? If yes, do I need to adjust the bake time?
Hi Alicia, you can definitely omit the second egg wash. I do it twice so the tarts get a nice golden yellow, glossy finish.
Baking time should be the same whether or not you do one or two egg washes, but I would bake long enough until the base of the tarts start to lightly brown, about 25 minutes, give or take a few.
I’m a Singaporean but living in Houston, Texas. Thank you for the detailed recipe. I’m definitely going to make it in the next few days. Unfortunately I’d already made the pineapple jam earlier on before I found you. Happy festive holidays!
Thank you so much for this recipe. It is brilliant! I use plain flour and replace a tbsp of it with corn flour to make it like cake flour. Egg wash uses only 1 egg Yolk with milk and added a little of confectionery sugar since I didn’t use condensed milk.
I like it and my partner couldn’t stop eating. I find the milk powder a little over powering (this could be personal).
You have given the precise weight of the pineapple paste and the dough is simply amazing.
Forget to say a superb big thank you to apply the 2nd wash – it is the 2nd wash that make that huge difference. I really learn something this round! THank you.
By the way, it took me over 2 hours to make this.
I made the tarts and everyone loved it. I was wondering if this recipe can be used if I want to make them in cubes.
Hi Subaanthi, I’m so thrilled to read that this worked out really well, thank you for sharing! This pastry dough would be too soft for cubed tarts if you’re thinking of using it to make the Taiwanese-style square-shaped pineapple tarts. You could tweak the dough by using plain flour instead of cake flour to get a firmer pastry, but as I’ve not tried it myself, I can’t be sure if this will give you the texture you’re looking for.
Hi! I’m currently based in the U.S. and really missed pineapple tarts, especially during Chinese New Year. So, I decided to make them myself! I followed both of your recipes—the pineapple filling and the pastry dough. I substituted cornstarch with potato starch and omitted the milk powder since I didn’t have any in my pantry. They turned out fantastic and were a crowd-pleaser when I brought them to a CNY party. I’ll definitely bake them again next year! 🙂
Hi there Celia, Many greetings from Sydney, Australia. am so very grateful I found your blog. I am wanting to try this recipe but in the renowned salted egg version.
Can I just add salted egg yorks to the dough? Would love your advice here.
Thank you for your guidance.
Hi Maggie, thank you so much for reaching out! I’m so sorry if this reply isn’t in time for your pineapple tart bakes (things have been a little crazy at my end as I was in the midst of a minor home renovation!). Salted egg dough sounds delish but I personally haven’t tried it myself.
If I had to wing it, I’d only use the powdered form of salted egg yolks and add it straight into the dough though I would probably make a small test batch of dough (and scale up from there once you’ve found the right flavour balance).
Thinking out loud here, but I might replace at least half (or more) of the milk powder with the powdered salted yolks to avoid enriching the dough too much. Or replacing one egg yolk with the powdered yolks and adding a bit of water, just enough to bind the dough together without crumbling or breaking apart when you wrap the filling. You would also have to balance the saltiness of the dough.
I really would love to know if you tried it on your own (since I wasn’t able to reply you sooner)! Hope your Chinese New Year bakes
went well!
Love the crust recipe. Pineapple tart turns out well. But i have some question mind.
Is 1hour+ time is enough to let the tart cool completely?
I made mine smaller tarts with 1kg pineapple paste. Yield 125 tarts.
Thanks for the awesome recipe.
Hi Kelly, glad to hear this turned out to your satisfaction. It would be best to allow the tarts to cool completely before storing to ensure a longer shelf-life. How long it would take would depend on how warm or cool the environment is. An hour plus should be ample time though. Thank you so much for taking the time to leave a review!
hey celia! can i check if it’s possible to make this using air fryer? my oven unfortunately broke down recently 🙁
Hi Jae, I’ve honestly never tried baking these pineapple tarts in an air fryer so I can’t say with certainty from personal experience. I suppose it would depend on the particular air fryer function/settings – if it has a setting that allows you to bake cakes (some brands do), it could work out well. Hope this helps!
Love this recipe! Thanks for sharing them!
Thank you so much, Rachel! I’m so glad you love this!
Hi Celia. I just want to wish you 新年快乐 身体健康.
祝福, Doris
Why do we need to chill the tart before baking? this recipe seems to be more troublesome! i mean it is taking more steps then ever … you chill then need to bake longer … for what effect do we need to do that for? can you please advice if this step is a must?
Hi Soon Yin, chilling the filled tarts (like most shortcrust pastry or pie dough) helps the butter firm and allows the tarts to hold their shape better during the baking process, even though it will necessarily add on a few minutes of extra baking time.
Though you can skip this step (it’s entirely your preference😉), I find the tarts tend to turn out better when I spend the time to let it chill. Also, it’s only when the butter is cold enough that it melts immediately in a hot oven, allowing the pastry to bake up a bit flaky and crisp. Room temperature dough won’t give quite the same texture. Hope this helps!
I have personally tried this recipe and love this so much . My friends also complimented better than buy from outside ones 🙂 thank you so much for sharing . It’s not easy to get a good recipe and really grateful learning from you
Hi Amelyn, thank you so much for sharing! I’m thrilled this recipe worked out so well for you!
Have tried a few pineapple tart recipes but this is by far the best one I had and will be a keeper! Dough was easy to work with, great flavor, great texture. I subbed buttermilk powder for the milk powder and it turned out really well.
Hello C, I’m so thrilled to hear how this recipe turned out for you, with the buttermilk powder substitution. That’s so helpful to know! Thank you so much for sharing, and wishing you a smooth and prosperous Year of the Rabbit in 2023!
Hi celia thanks for the amazing recipe. I do find the dough abit soft amd sticky so i actually added more flour in. I jus add till the dough not sticky. No actual amount.
Hi Eslynn, I’m so happy to hear this recipe worked out well with the added flour. Totally okay to add just enough (not too much) to help you work more easily with the dough. Thank you so much for sharing!
Hi Celia, Happy New Year!
I tried making this for the first time, really tasty! Love it!
Just wondering, can I use pineapple tart mould (pineapple shaped, hand press mould) for this recipe? Will the tarts stay in shape after baking?
Thank you!
Hi Diana, thanks so much for sharing, so glad this turned out well! I haven’t used those moulds you mentioned so I can’t say for sure. I reckon the pastry will hold it’s shape well but to facilitate easy release, I would dust the moulds generously with flour as well as chill the filled pineapple balls long enough before pressing into the mould to help prevent the dough sticking to it. It may help to try with a small test batch.
Hi Celia,
I have tried your recipe and the tart taste amazing! Thank you.
However the pastry seems very sticky and I couldn’t roll out on palm at all.
Also the tart turned mouldy less than 2 weeks in air tight container with oxyen absorber.
Did you encounter the above? Could advise on the remedy?
Thank you.
Hi Eddie, thank you for sharing. I’m happy you really like the flavour. Can I ask if you cooked your own pineapple jam filling? This once happened to me because my jam wasn’t cooked dry enough and the moisture content caused the tart pastry to turn mouldy.
To prevent this, you could re-heat the baked tarts in a moderately low oven (eg. 125 – 140 deg C) for 15 minutes to rid the pastry of excess moisture. It also helps crisp up the tarts again.
If the pastry dough was sticky to handle, it could be that it’s gotten too warm. Working in batches can help, so you only work with a certain amount of dough (i.e. fill the balls) at a time. Keep the rest chilled until you’re ready for the next batch. It may help also to regularly dust your palms with flour to prevent the dough from sticking.
I hope this helps!
Hi Celia,
Thank you for your advice.
Yes, I cooked my own pineapple filling. Does increasing the temperature of the oven and/or the bake time for a new batch of pineapple tart helps to prevent mould?
Hi Eddy, if you haven’t made the tarts, I would go as far as to re-cook the pineapple jam to dry it out more as the moisture content could still be an issue for your new batch of tarts. I explain how to re-cook pineapple jam (do not add water) in my pineapple jam recipe post.
However, if that’s not possible or too much of a bother, then bake at the stated temperature but lengthen the baking time by additional 10, even 15 minutes, as long as the pastry doesn’t brown too much should be okay.
Then make sure the tarts have completely cooled to room temperature before you pack them into their containers (adding the oxygen absorbers as you did before are definitely helpful!)😉
Hi Celia! Loved the tarts! I live in a seasonal country. The tarts were amazingly tender and melt in the mouth during warmer seasons. When baked in winter, the tarts tend to harden during storage. Am I doing anything wrong? Thanks!
Hi Celia,
Pls advise how many gm of egg yolk. I only have kampong eggs & they’re small so not aure if one kampong egg yolk is sufficient.
Thank you so much,
Angeline
Hi Angeline, the egg yolks I use weigh about 16 grams each. So, 32 gm in total for 2 yolks if you’re making one batch of the pastry dough.
Hi Celia. 农历新年快乐 。Thank you all these years for your guidance and kindness. Warm regards.
Hi Celia, it’s that time of the year again to start making pineapple tarts! Can I check if you turned on the fan in your oven when you are baking them? And if you reduce the size of the pineapple balls, do you also reduce the baking time?
Hi Diane, yes, it’s time for exciting festive bakes! I use conventional baking mode (not fan-forced) when baking these pineapple tart balls. If you use less pastry dough for smaller balls, it will be a shorter baking time. Also, it depends on the thickness of the pastry.
Thank you for this recipe! I made it today just in time for cny and my family loved it! I omitted the milk powder and it was still very nice, pastry is super nice. Also nice to eat warm out of the oven 😋
What kind of oil to use for the egg wash?
Hi Phiny, any neutral-flavored vegetable oil will do.
Hi Celia, I just tried your recipe for pineapple tart pastry and it is perfect! Both in looks and in taste/’mouth-feel’. Just what I needed having not been home in several years. Thank you for your detailed recipe, I’m keeping it for next time!
Hi Chao, thank you so much for sharing, I’m so glad to hear this turned out the way you like it. Have a great week ahead!
Hi Celia,
I do not have milk powder, please advise if I can omit or to replace with what.
Thanks,
Judy
Hi Judy, thanks for writing in! I haven’t omitted milk powder before so I’m afraid I can’t say for sure how replacing it with more cake flour or other ingredient will affect the texture of the pastry. I would just omit it, as it’s mixed in with the dough to give the pastry more flavour and colour. Hope this helps!
Hi Celia
What the substitute of Cake Flour and how to make your own cake flour from scratch? Thank you!!
Hi Rimma, you can make cake flour with all-purpose flour and corn flour. Here’s a great post on how to do it, hope this helps!
Your written recipe stated 2 egg yolks but picture no. 4 has 3 egg yolks.
I used 2 and my dough seems too dry, so I add 1 tsp cold water.
What is the right amount of the yolks?
Hi Sulis, it is 2 yolks – in the step-by-step photos, I did 1.5x the recipe amount since I was making a big batch. I apologise if this caused a bit of confusion. Sometimes, the dough can feel a bit dry as some flours vary in terms of their absorption properties. I would do as you did, either add a bit of cold water or half a yolk. How did the pastry turn out for you, may I ask?
Hi may I know whether the pastry dough can be use for pineapple roll nastar. Thanks.
Hi Julia, I’ve not yet tried using this pastry for nastar pineapple rolls. But I would probably say that it would be a bit too tender, because of the cake flour and amount of butter.
Hi Celia, Happy New Year 2021. With the cooling weather, it is perfect to gear up and bake pineapple tarts. I will use a 6-cm round cutter and cut individual dough pieces as per your recipe. Can you advise the weight of the filling so I can roll it into balls in advance? Many thanks and best regards.
Hi Doris, thank you so much and I wish you a great start to 2021! I don’t usually weigh the paste filling, I just eye-ball it – much faster this way especially if you’re making a lot of tarts. I try not to make them too big, about 2 tsps of paste each for the 6-cm rounds, so that you can easily enclose the paste. By the way, I’ll be updating the recipe soon mid month, with step-by-step pics and a few options for the pastry dough. Just thought you might like to know! Happy baking!
☺hi there…i would like to know how many types of tart pastries are there?
Would you be kindly enough to share the recipes with us? Tq very much so far.?
Hi Kana, thank you so much for writing in! I’m sorry I took a while to respond. Generally, I like to use a shortcrust pastry as a base for tarts, but depending on whether you’re using sweet or savoury tart fillings, you could also try using puff pastry or sugar crust pastry to make your tart shells. At the moment, I have several recipes for shortcrust pastry on the blog – you can check them out here, here and here. Hope these options help you in your baking!
Hi Celia, would this pastry be just as good for openfaced tarts?
Hi Sandra, I haven’t used this for open-faced tarts, but it is basically a shortcrust pastry so I’d say yes.?
Hi Celia, I am so lucky to have stumbled upon your amazing blog!! I love everything about it! I am going to try your recipe for the pineapple tart pastry. I realised the ingredients include baking powder and self raising flour. Just curious to know if the pastry would rise when baked although the photos do not seem to show it. I have been using another recipe which does not use any rising agent. Thanks!
Hi Sharon, thank you so much for your lovely message! I’m so totally happy to have you join me here!? To answer your question, the pastry will rise a bit so I space the tarts at least 2-cm apart when baking. I really hope this pastry recipe pleases you, it is a fabulous one handed down to me from a good friend who used to teach baking courses in her younger years, and her pineapple tarts, exactly as I’ve shared it on the blog, were immensely popular! I’d love to hear how it works out for you! Enjoy!?
Hi Celia,
I finally made pineapple tarts today. I used your pastry recipe and they turned out great. I made some pineapple shaped ones and they were very cute. They require quite a bit of time though so I end up switching to make the open faced tarts. This pastry works really well for open- faced tarts too! It is very easy to work with compared to the recipe I have been using. I will definitely be using your recipe from now on. Thank you so much!
Hi Sharon, thank you for sharing!!???? It’s so wonderful to hear how well this pastry worked out for you, I’m delighted! Thank you so much for giving this a try! Enjoy your CNY feasting!!???
Hi Ms.Celia,
The tarts are designed so well that they resemble real pineapples. Great work and this recipe is in my immediate cooking list.
Thank you so much for your kind compliment! I do hope you’ll try it soon…it’s a bit of work but you’ll really get priceless satisfaction out of it! Hope you’ll share with me when you do! Happy baking! Cheers, Celia
Celia your pineapple tarts are so beautiful and am sure they taste just as good!
Thank you so much, Lynnette!