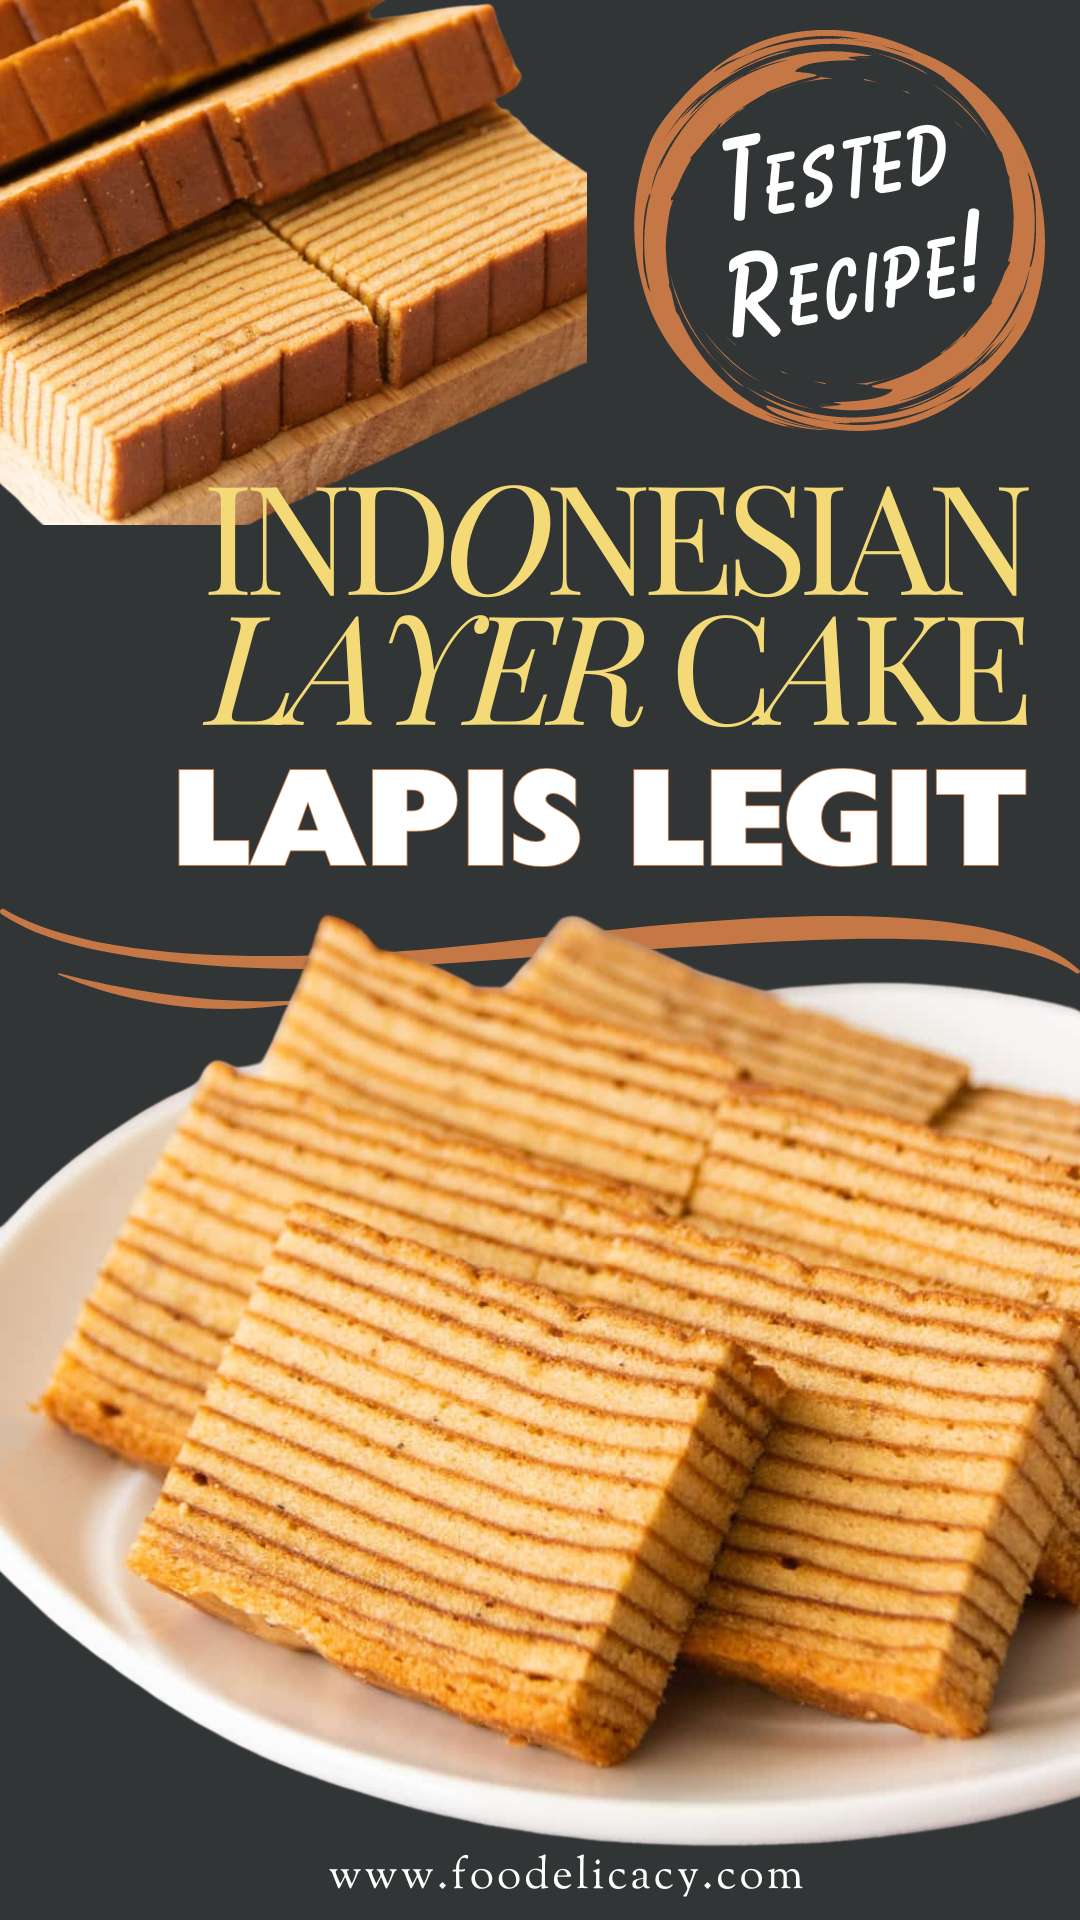
Traditional Indonesian Layer Cake (Thousand Layer Spice Cake/ Kue Lapis Legit)
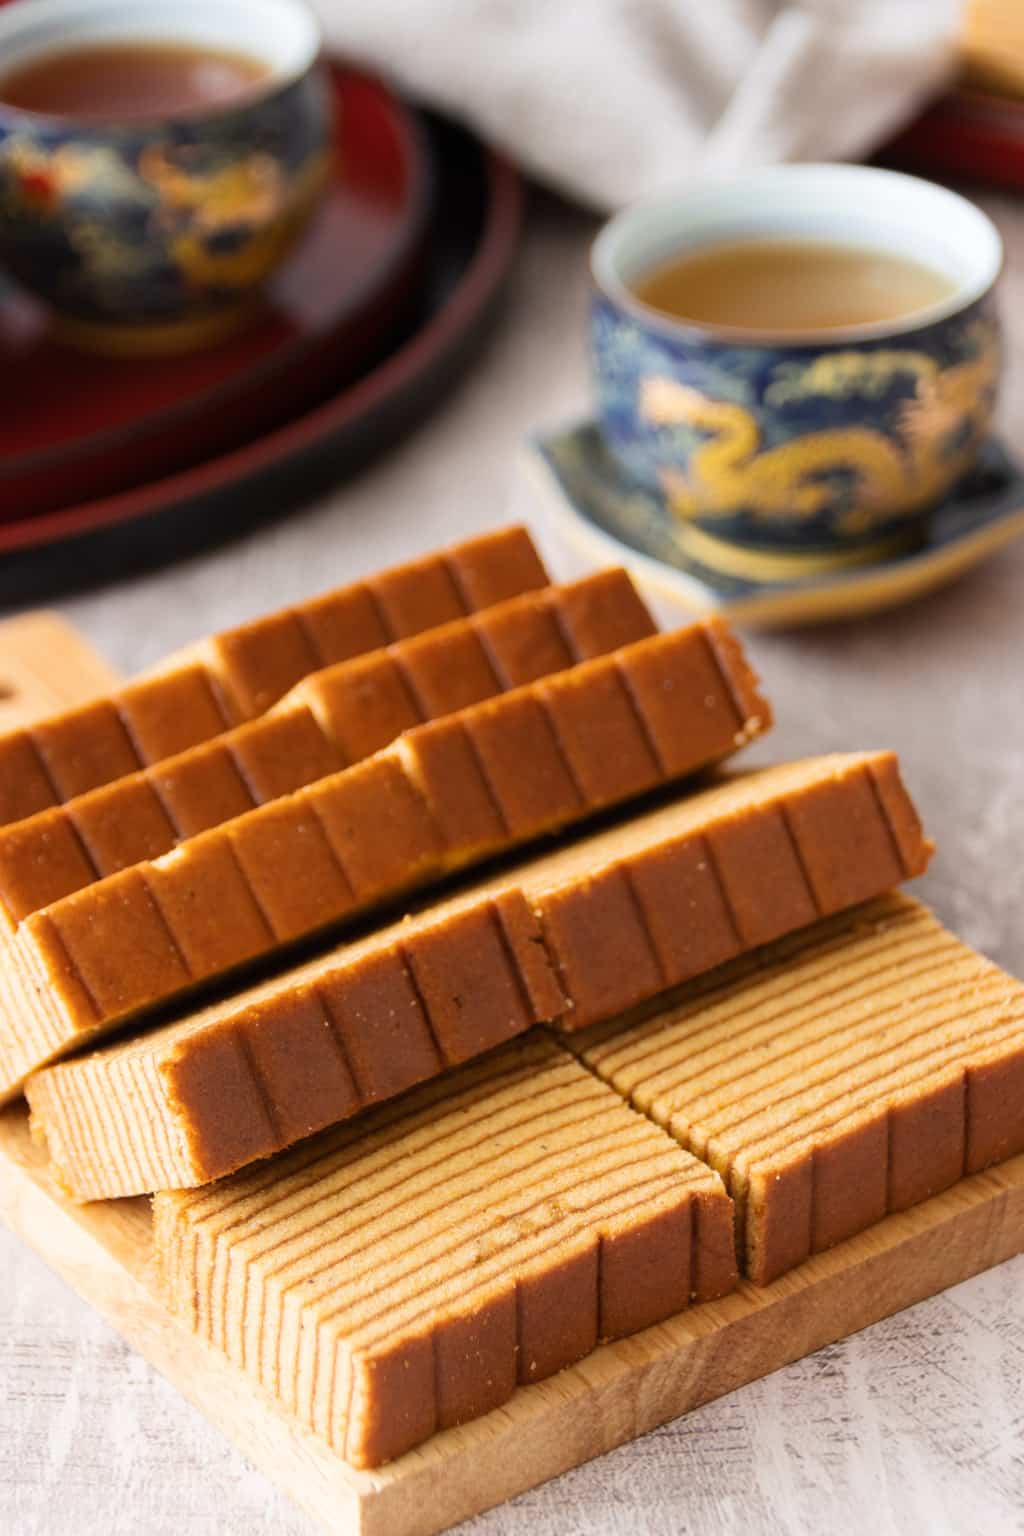
Indonesian layer cake or kue lapis legit is an ultra rich and moist butter cake baked layer by layer. It has warm flavours of mixed spices such as cinnamon, cloves, nutmeg, and cardamom, and the subtle hint of vanilla.
Indonesian spice layer cakes are must-have Lunar New Year treats in our home to offer family and friends when they come calling or visiting.
These unique butter cakes go by their local name, kue lapis legit, in Indonesia, Singapore and Malaysia. It is sometimes referred to as a ‘thousand layer cake’, most likely to impress how laborious and time-consuming it is to bake this cake, layer by layer.

Save for Later:Indonesian Layer Cake {Kue Lapis Legit}
Pin this on PinterestIndonesian layer cakes these days offer unique flavours and textures. Popular variations include layers baked with dried or mixed fruit thrown in such as this prune layer cake, or incorporated with the puree of tropical fruits such as this durian layer cake.
About this traditional Indonesian layer cake
Now, there’s no denying that layer cakes have an insane amount of eggs, egg yolks and loads of butter.
Did you know some traditional Indonesian recipes even call for as many as 25 egg yolks! But this is no time to be thinking of calories!
If you’re looking to make this, you’re just in time for my recipe update. This Indonesian layer cake is authentic and traditional in flavour.
Rich, buttery and moist, but not overly greasy. And it has just the perfect balance of mixed spice and vanilla, in my humble opinion. I’m really hoping you’ll enjoy this improved version!

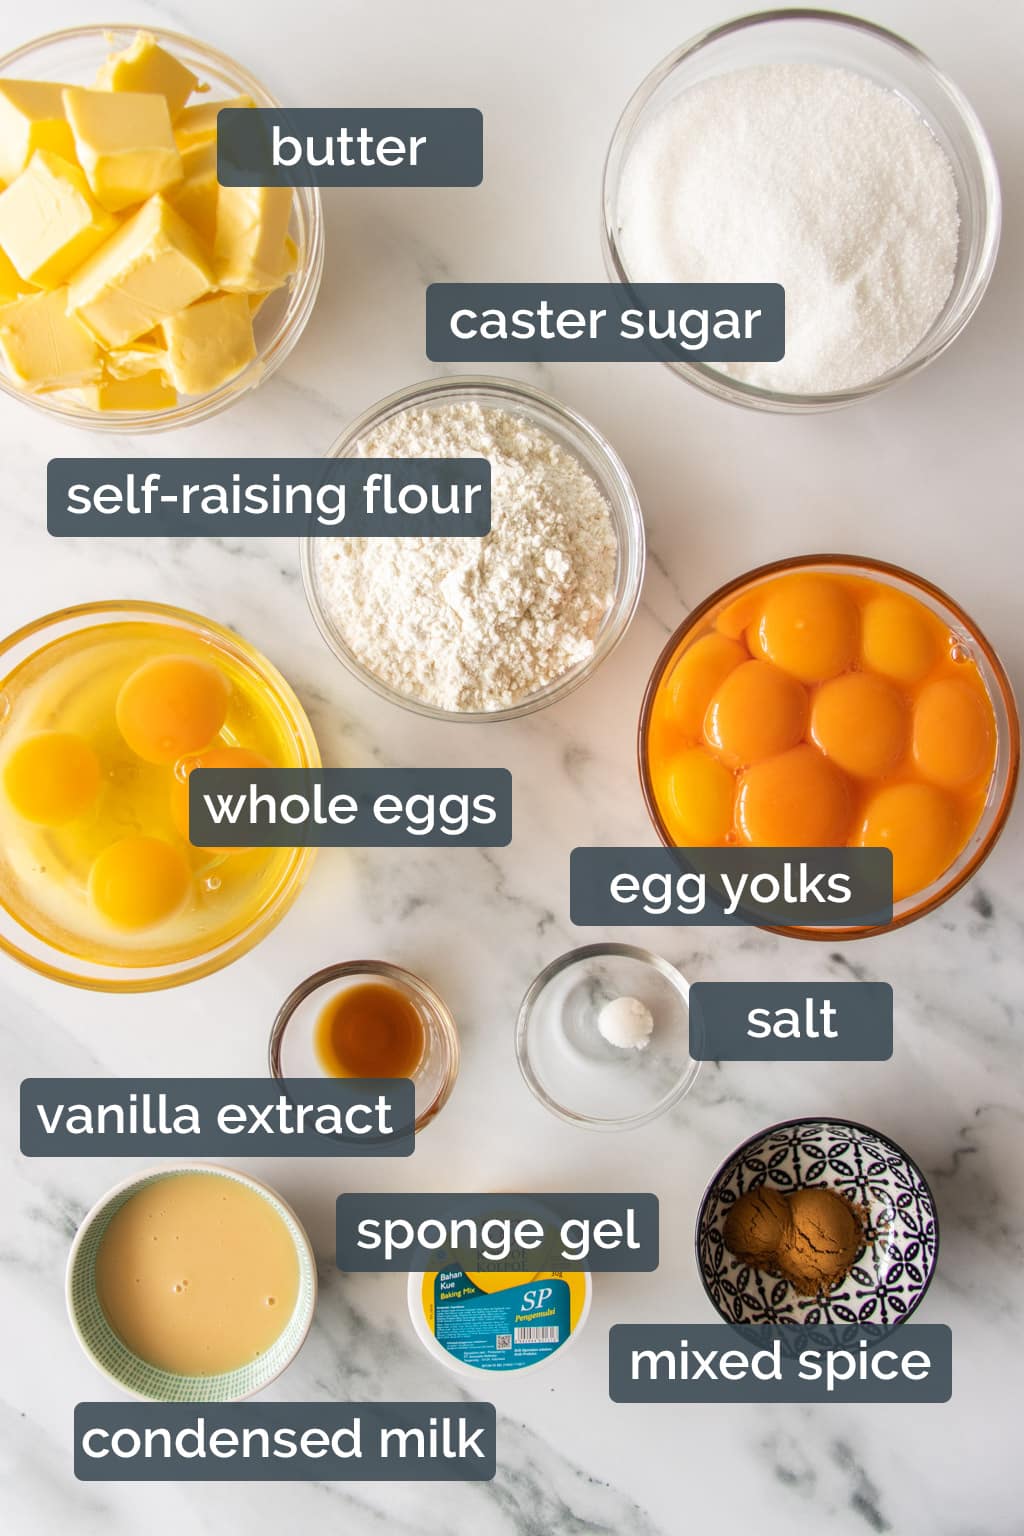
Ingredients for Indonesian layer cake
- butter
- caster sugar
- condensed milk
- self-raising flour (update: I have baked this exact recipe replacing the self-raising flour with cake flour and 1 ⅛ teaspoon of baking powder, and it turns out a more tender cake)
- ready-made lapis cake spice (rempah kueh) or mixed spice (or make your own)
- whole eggs
- egg yolks
- salt
- sponge gel (also referred to as sponge cake emulsifier/ stabilizer)
- vanilla extract
- brandy (optional)
How to make Indonesian layer cake
Layer cakes are quite easy to make, but it does need a few hours and attentiveness because these layer cakes are grilled one layer at at time.
Each layer is made by pouring a small amount of cake batter into a baking pan, and then grilled under the top heat of an oven until it is baked golden.
The tin is then removed from the oven and the process is repeated, adding layer upon layer, until all the batter is used.

For instance, it takes about 2.5 hrs to bake an entire cake like this with 13 layers.
You’ll probably be hovering constantly by the oven, and that’s why this cake is often considered a labour of love!
Step-by-step: Making the cake batter


- Step 1: Sift self-raising flour (or cake flour and baking powder), mixed spice and salt into a mixing bowl.
- Steps 2 & 3: Fit a stand mixer with a paddle attachment. At medium speed, cream butter and condensed milk until smooth, light and fluffy, about 5 – 7 minutes. Stop the mixer once or twice to scrape the butter down the sides of the bowl. If you’ve only got one mixer bowl, scoop out the butter mixture into another bowl. Thoroughly wash and dry the mixer bowl.
Note: Do not use high speed as the heat generated could warm the butter, making the mixture greasy. Beat until the mixture feels light, fluffy and creamy on your spatula.
- Step 4: Swap the paddle with a whisk attachment. In the clean and dry mixer bowl, whip whole eggs, egg yolks, caster sugar and sponge gel on medium speed until pale, very thick and fluffy. This may take 10 – 15 minutes given the quantity of eggs, the temperature of the eggs as well as the mixing speed.
Note: Do not rush through this step by beating at high speed. It may take more than the time stated, but do not worry. It is important to beat as long as required to get to the ribbon stage.
- Step 5: Whip until ribbon stage. This is when the mixture falls back into the bowl in ribbons, which pools on the surface for a while (at least 7 seconds) before disappearing into the mixture. Now, switch to low speed and beat for 1 – 2 minutes to reduce large air bubbles in the batter. The mixture should look silky smooth and glossy.
- Step 6: Now tip in the sifted flour-spice mixture and continue beating until well incorporated. About 15 seconds.
- Step 7: Reduce the mixer speed to low. Add the creamed butter mixture in 3 additions, each time beating until well mixed before adding the next.
Tip update! Before beating in the creamed butter, I find it helpful to give it a light beating by hand (with a spatula) to aerate it again as the butter may have firmed up after sitting a while. Then add one cup of the beaten egg mixture to the creamed butter and fold until the mixture is smooth and well combined. This will help lighten the creamed butter and minimise the butter mixture separating and curdling when mixing with the egg mixture.
- Step 8: Lastly, stir in the vanilla extract and brandy (optional) until well mixed.

Step-by-step: Building the cake layers
Get your oven going and pre-heat to 200°C (392°F) with top and bottom heating mode. Position the oven rack in the centre of the oven.
Now’s the time to get your baking pan ready, if you haven’t done so already. It’s usually the first thing I get done and out of the way, even before I start prepping the cake ingredients.
Remember to switch your oven to grill mode (after it’s reached the stated temperature) and heat up the cake pan for 2 minutes.
Note: It’s also very important to know your grilling temperature range. I use the lowest level in my oven as it maintains an internal baking temperature between 200 – 210°C (392 – 410°F). Use the grilling level that gives you this temperature in your oven.


- Scoop a ladle of batter (or you can weigh 80 – 85 gm). Spread the batter with the back of a metal spoon to fill the base. Level the first layer as evenly as possible.
- For the 1st layer, grill for 3 minutes until cooked and lightly browned. Do not over-bake the first layer.
Note: I usually regard the first 2-3 layers as ‘sacrificial’ layers, so don’t get hung up over these starting layers as long as you don’t burn any. Once you get into the work flow, are able to adjust the grilling temperature if it’s too hot, and also determine the baking time, then the subsequent layers will turn out much nicer.
- Remove from the oven, prick a few holes in the baked layer. If there were air bubbles, gently press with a lapis press – you don’t need to if the layer baked up nice and flat. But just don’t apply too much pressure, or else the cake will end up compact and dense. Spread the next layer of batter.
Again, spread with the back of a spoon and shake/jiggle the pan to level it evenly. Tap the pan hard on the counter once or twice to minimise air bubbles. Grill for 5 – 6 minutes, or until a deep golden brown. Optional: Rotate the pan halfway through the baking time – this helps the layer to brown evenly.
Note: In spite of your best efforts, trapped air bubbles may balloon under the layer during the grilling process. This is normal. Prick the air bubbles as soon as they start to form, before the crust begins to set. It’s perfectly okay to quickly open the oven door, pull out the oven rack a bit so you can safely prick it with a toothpick or cake skewer to let the air escape. Then close the oven door again.
- Repeat layering and grilling until all the batter is used up. Note: The last 2 to 3 layers will take less time to bake and brown, so do observe the cake frequently and watch the time.
- Once the last layer has lightly browned, set the oven mode to top and bottom heating at 180°C (356°F) and bake the cake for another 2 – 3 minutes. During this last few minutes of baking, you can cover the top of the pan with aluminum foil if it gets too brown.
- Allow cake to cool in the pan for 5 minutes. Run a knife along the edges and invert the cake to release. Set on a wire rack until completely cooled.
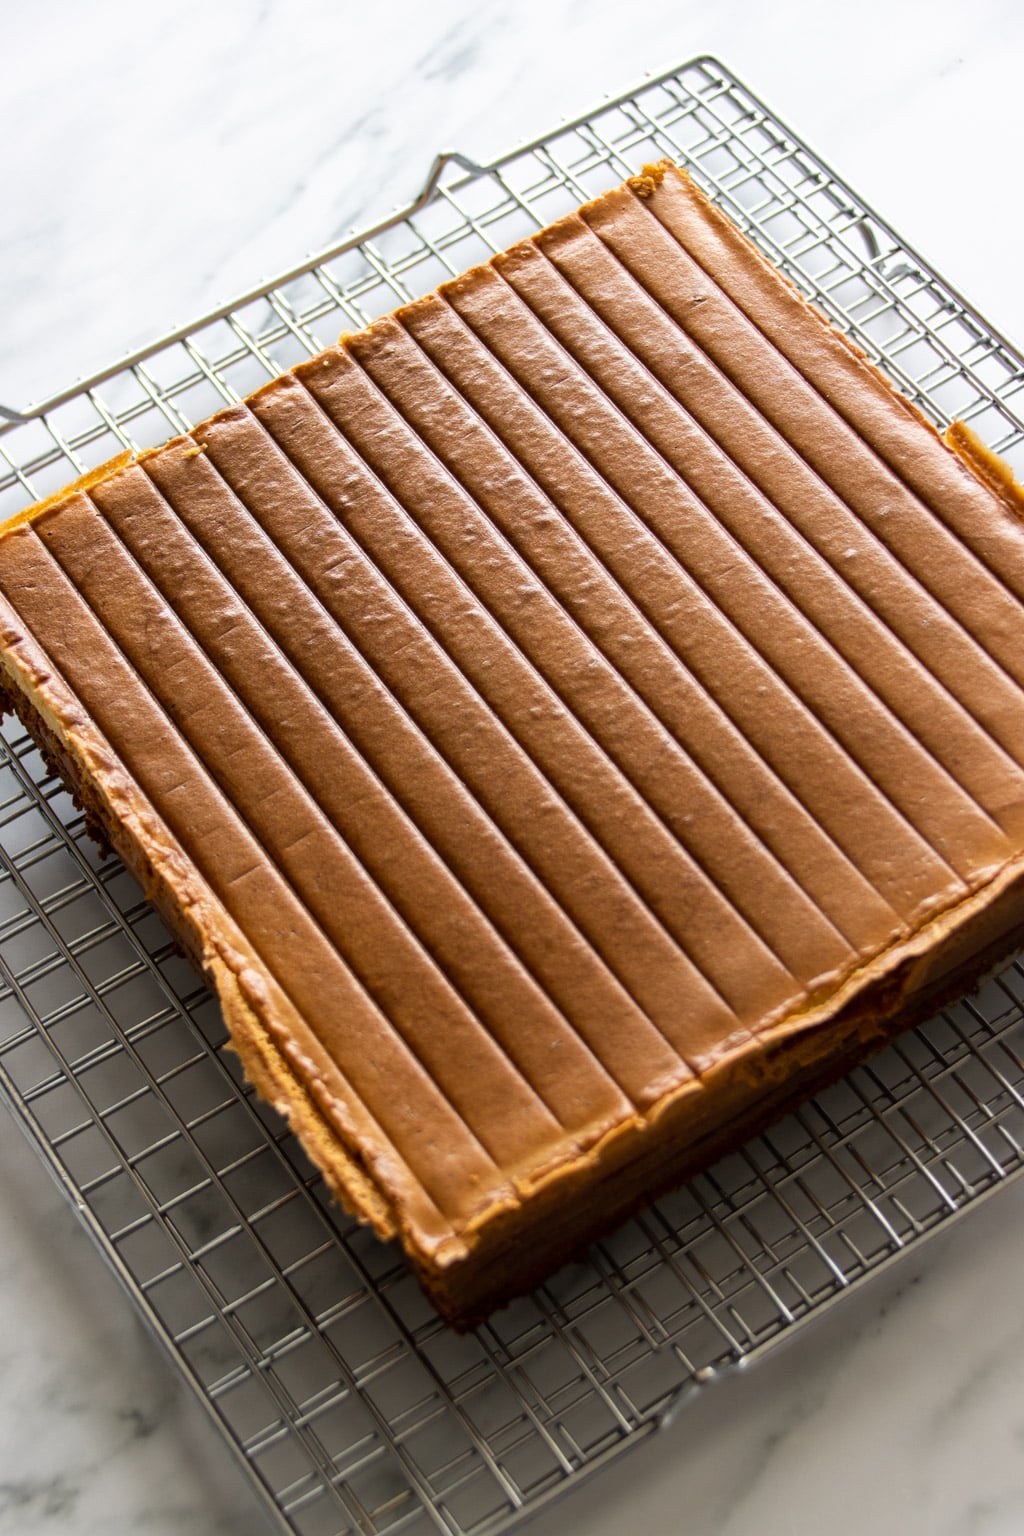
Now, for the most exciting part after all that effort! Trim a bit off the sides of the cake to reveal the beautiful layer pattern.
To store, make sure the cake has completely cooled. Store in an air-tight container at room temperature, and it will keep well for up to 5 days.
If storing for longer, wrap the cooled cake tightly with a few layers of clingwrap, and chill for up to 3 weeks or freeze for up to 3 months.
Baking layer cakes: Helpful tips to avoid some common pitfalls
Have all the cake ingredients at room temperature.
Eggs at room temperature will incorporate more air when whipped, than when cold. Butter should be just softened. It should yield slightly when lightly pressed, but not too soft as to feel oily.
The ideal temperature to have butter at is 19 deg C for optimal creaming. Take your time and be sure to cream till the butter feels light and fluffy on your spatula.
Place the cake pan in the centre of the oven.
If cake pan is placed too far down from the top heat, it will take much longer to brown the layers. The extended grilling may dry out the layers.
The layers are fairly thin, so it’ll only take a matter of a couple of minutes to cook. It’s the browning that takes up the extra time.
Bake each layer to a golden brown.
The darker the toasted tops are, the more vivid the layered pattern will be, and also much more flavourful! Just be careful not to end up burning it.

Avoid spreading the layers too thin.
Too thin and the layers may run the risk of drying out and browning too quickly. You might even risk burning the layers, unless you’re ready to plomp yourself on a stool right in front of your oven door and watch it like a hawk.
Too thick, and you’ll have less layers to your cake, though that’s totally OKAY. I usually try to aim for anywhere between 10 to 13 layers, or about a 5-mm thickness per layer.
Remember to prick each baked layer with a fork.
Prick in just a few places across the layer. This will help minimise, though not necessarily prevent trapped air from ‘ballooning’.
If you see air bubbles forming as the layer bakes in the oven, don’t worry! Just open the oven door, quickly yank out the pan, prick those bubbles with a toothpick, and return it to grill.
Press lightly with a fondant press to get even layers.
This also helps to prevent air pockets from building up as you add on each layer. It also helps create a nice and tight pattern.
If there were air bubbles, gently press with a lapis press – you don’t need to if the layer baked up nice and flat. But just don’t apply too much pressure, or else the cake will end up compact and dense.
Adjust your oven rack, moving it down a level, if necessary, for the last 2 to 3 layers.
That’s because as the layers build up, the top gets closer to the top heating element and will brown very, very quickly!
Here are more awesome butter cake recipes to inspire your next bake:
- Indonesian Prune Layer Cake (Prune Lapis Cake)
- Durian Indonesian Layer Cake
- How to Make Rich & Moist Fruit Cake
- Very Rich Butter Cake
- Orange Pound Cake with Orange Cream Cheese Glaze
- Vanilla Pound Cake – Ultra Moist & Buttery!
Tried this recipe? I’d love to see! Remember to share your pics on Instagram and tag @foodelicacy or #foodelicacy.
Traditional Indonesian Layer Cake (Kue Lapis Legit)
Ingredients
- 100 g self-raising flour or replace with cake flour and add 1 ⅛ tsp baking powder
- 1½ tsp ready-made lapis cake spice (rempah kueh) or mixed spice
- ¼ tsp salt
- 250 g unsalted butter softened at room temperature
- 2 tbsp condensed milk
- 3 whole eggs large
- 16 egg yolks
- 250 g caster sugar
- 1 tbsp sponge cake gel/emulsifier I use SP or Ovalett
- 1 tsp vanilla extract
- 1 tbsp brandy optional
Instructions
- Preheat oven to 200°C (392°F). Grease and line the base of an 8-inch (20-cm) square cake pan with baking paper. Position the oven rack in the centre of the oven.
- Sift self-raising flour (or cake flour and baking powder), mixed spice and salt into a mixing bowl. Set aside.
- In a stand mixer fitted with a paddle attachment, cream butter and condensed milk at medium speed until smooth, light and fluffy, about 5 – 7 minutes. Stop the mixer once or twice to scrape the butter down the sides of the bowl. Set aside.Note: Do not use high speed as the heat generated could warm the butter, making the mixture greasy. Beat until the mixture feels light, fluffy, and creamy on your spatula.
- Fit the stand mixer fitted with a whisk attachment. In a clean and dry mixer bowl, whip whole eggs, egg yolks, caster sugar and sponge gel on medium speed until pale, very thick and fluffy. This may take 10 – 15 minutes given the quantity of eggs, the temperature of the eggs as well as the mixing speed.Note: Do not rush through this step by beating at high speed. It may take more than the time stated, but do not worry. It is important to beat as long as required to get to the ribbon stage.
- Whip until ribbon stage. This is when the mixture falls back into the bowl in ribbons, which stays on the surface for a while (at least 7 seconds) before disappearing into the mixture. Now, switch to low speed and beat for 1 – 2 minutes to reduce large air bubbles in the batter. The egg mixture should look silky smooth and glossy.
- Tip in the sifted flour-spice mixture and continue beating until well incorporated. About 15 seconds.
- Reduce mixer speed to low. Add the creamed butter mixture in 3 additions, each time beating until well mixed before adding the next.Tip update! Before beating in the creamed butter, I find it helpful to give it a light beating by hand (with a spatula) to aerate it again as the butter may have firmed up after sitting a while. Then add one cup of the beaten egg mixture to the creamed butter and fold until the mixture is smooth and well combined. This will help lighten the creamed butter and minimise the butter mixture separating and curdling when mixing with the egg mixture.
- Last, tip in the vanilla extract and brandy (optional) and beat on low speed for 5-10 seconds until well mixed.
- Heat the cake pan in the preheated oven for 2 minutes. Switch to grill mode (top heating only). Note: It’s also very important to know your grilling temperature range. I use the lowest level in my oven as it maintains an internal baking temperature at around 200 – 210°C (392 – 410°F). Use the grilling level that gives you this temperature in your oven.
- Scoop a ladle of batter (or 80 – 85 gm by weight) and spread with the back of a metal spoon to fill the base. Level the first layer as evenly as possible.
- For the 1st layer, grill for 3 minutes or until cooked and lightly browned. Do not over-bake the first layer.Note: I usually regard the first 2-3 layers as ‘sacrificial’ layers, so don’t get hung up over these starting layers as long as you don’t burn any. Once you get into the work flow, are able to adjust the grilling temperature if it’s too hot, and also determine the baking time, then the subsequent layers will turn out much nicer.
- Remove from the oven, prick a few holes in the baked layer with a fork. If there were air bubbles, gently press with a lapis press – you don’t need to if the layer baked up nice and flat. Spread the next layer of batter. Again, spread with the back of a spoon and shake the pan to level it evenly. Tap the pan hard on the counter once or twice to minimise air bubbles. Grill for 5 minutes, or until golden brown.Note: In spite of your best efforts, trapped air bubbles may balloon under the layer during the grilling process. This is normal. Prick the air bubbles as soon as they start to form, before the crust begins to set. It’s perfectly okay to quickly open the oven door, pull out the oven rack a bit so you can safely prick it with a toothpick to let the air escape. Then close the oven door again.
- Repeat layering and grilling until all the batter is used up. Note: The last 2 to 3 layers make take less time to bake and brown, so do observe the cake frequently and watch the time.
- Once the last layer has lightly browned, set the oven mode to top and bottom heating at 180°C (356°F) and bake the cake for another 2 – 3 minutes. During this last few minutes of baking, you can cover the top of the pan with aluminum foil if it gets too brown.
- Allow cake to cool in the pan for 5 minutes. Run a knife along the edges and invert the cake to release. Set on a wire rack until completely cooled.
- Trim a bit off the sides of the cake to reveal the layers. To store, wrap the cooled cake tightly with a few layers of clingwrap, and chill or freeze.


