Red Bean Milk Loaf (Tangzhong Method)
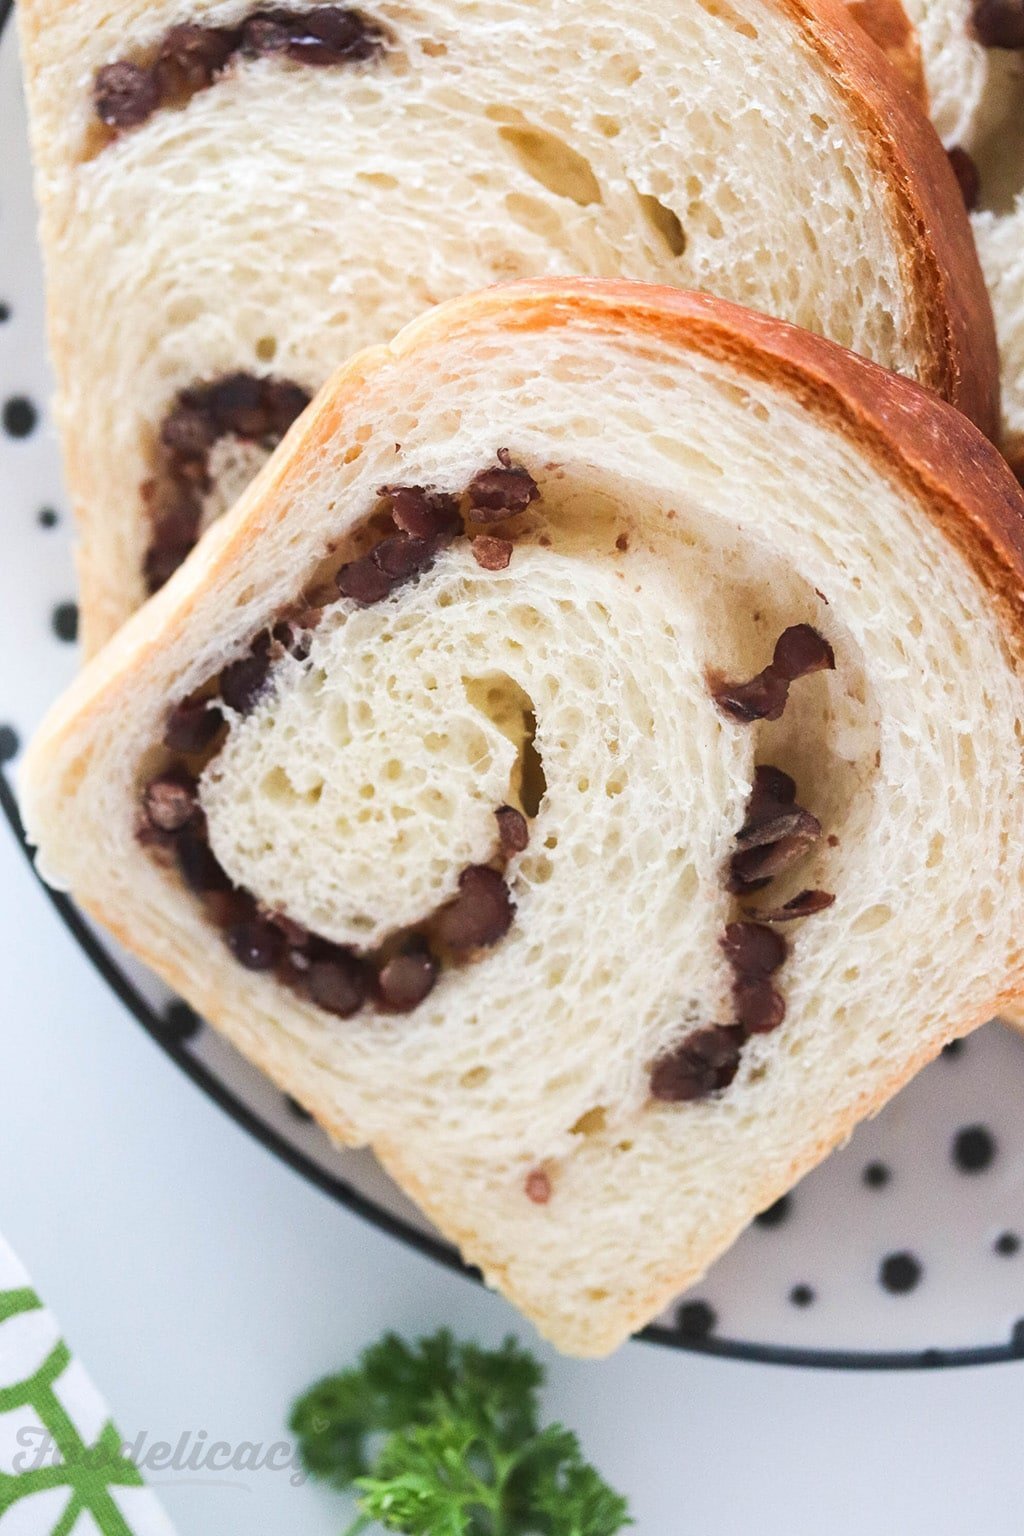
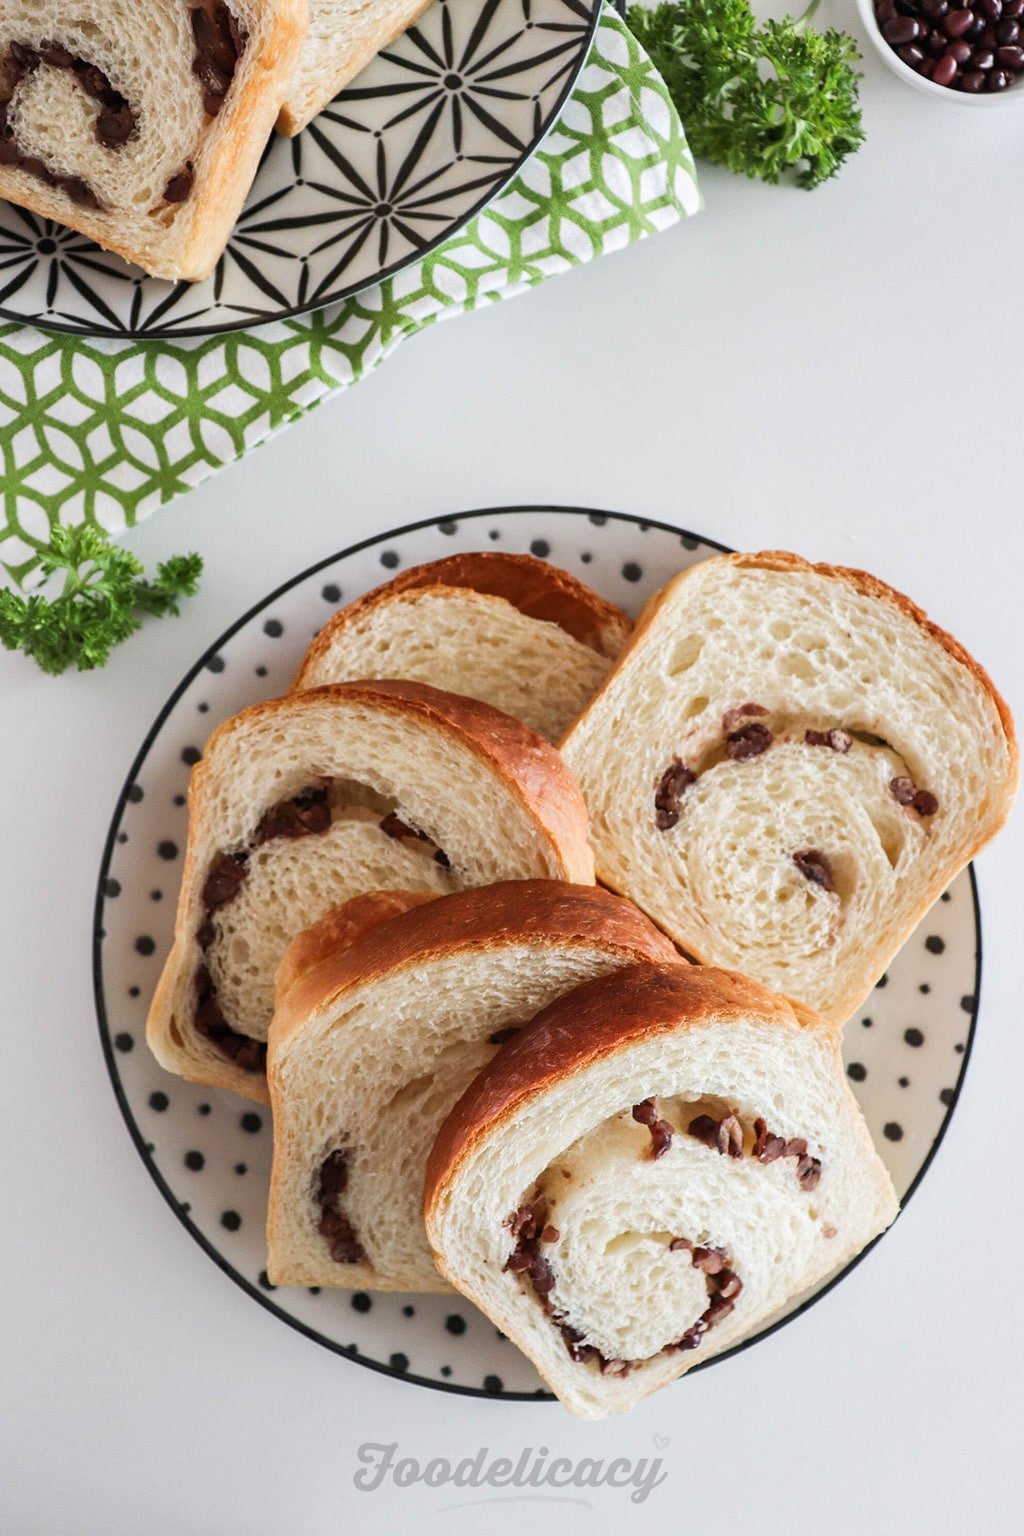
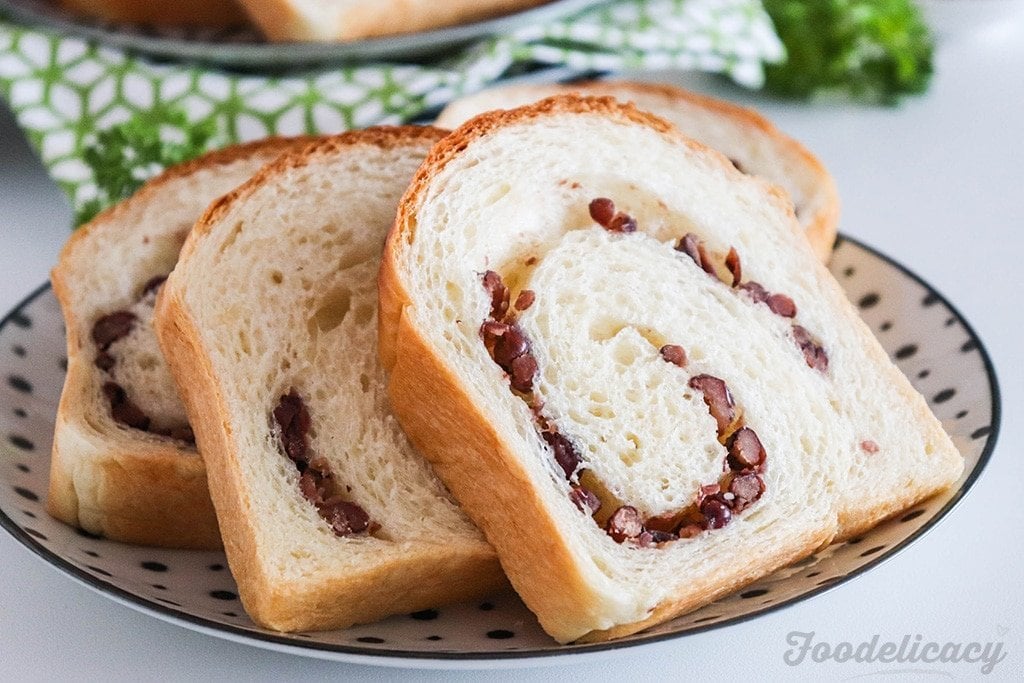
Red bean milk loaf is a super soft and fluffy Asian sweet bread, with the added goodness of nutritious red adzuki beans. It’s delicious eaten plain, generously slathered with butter or your favourite jams and nut butters.
Red bean milk loaf is such a tasty treat that I’ve made four this past week alone. We just can’t seem to ever have enough of it in our home!
We love its delicious creamy flavour, soft and chewy texture, and its very subtle sweetness. You’ll find that this loaf is super tender, perfectly fluffy and delightfully springy!
Not to worry, these slices are firm enough for you to slice neatly without getting squished down to a pancake, so they’re perfect for sandwiches as well.
About the red bean filling
Red bean filled loaves and buns are our absolute favourites! With the red bean filling, I find that these milk loaves are just the right sweetness!
Here, I use canned red adzuki beans, which is different from red bean paste. With the canned variety, the red beans are whole, cooked, and slightly sweetened.
I particularly like the Japanese brands, which you can get in most Asian supermarkets. Once you open a can, simply drain the beans over a sieve set on a bowl to let the excess syrup drain. Then its ready for your filling.
How to get the softest and fluffiest crumb in your bread
Up until recently, these delicious butter coconut buns were the standard I held myself to for the best possible soft and tender bread.
And then not too long ago, a little bee told me of a technique which has intrigued me since – Tangzhong.

Save for Later:Red Bean Milk Loaf
Pin this on PinterestI know what you’re probably thinking! Whoa, what was that? Come again? Or you could be saying to me, haven’t you heard of this?
I initially thought to myself – “Gosh, this sounds complicated!”. But as I found out, the tangzhong method is surprisingly very simple.
Even more jaw-dropping, it adds no more than 5 minutes to your bread making process.
Believe me, this will be the best 5 minute investment of time and effort that you could ever put into your bread making!
I need you to take a leap of faith and hang on to what I’m about to show you here. Because it will completely transform the way you make and devour your slice of dough. FROM. THIS. DAY. FORTH.

To be perfectly honest, I’ve been meaning to try this technique after seeing tons of articles and recipe posts on the wonders of using a tangzhong starter dough.
Admittedly, I’ve procrastinated and I am sooooo embarrassingly late in the game. But, better late than never, l guess.
Why use the tangzhong technique?
Before we get to what tangzhong is all about, you might be thinking why do it at all. I mean, you’ve probably been baking loads of bread, and I bet you’re more than satisfied with your trusted recipes.
But if you’re looking to improve the texture of your breads, or try something fascinatingly different, here’s an undisputed fact.
Tangzhong has long been the established technique to getting the softest, fluffiest and moistest crumb in your bread!

So what is tangzhong?
Tangzhong is an Asian technique originally developed by the Japanese, but it wasn’t widely known to home cooks until Yvonne Chen wrote about it in her cookbook ’65 °C Bread Doctor‘ published in 2007.
Basically, tangzhong, also known as tangzhong water roux or water roux, is a liquid mixture made by mixing one part flour with 5 parts water by weight. The flour-water mixture is gently heated until 65°C (149°F).
Although water is the liquid ingredient in tangzhong roux, it is quite common to see recipes often replace the water component in the tangzhong with milk, or a combination of water and milk.
How does tangzhong work?
65°C (149° F) is apparently the temperature at which the magical chemistry happens. When the flour is first mixed with water, it absorbs the water (hydration).
As it is heated, the flour particles start to swell as it absorbs water many times it’s weight. Eventually these particles burst, releasing starches and the mixture transforms into a thickened, translucent paste (the roux or slurry) with a pudding-like consistency.
The flour and water for the tangzhong dough come from the original amounts in the bread recipe. This way, the recipe ingredient amounts remain the same and the recipe stays in balance.

The recommended amount of flour in the tangzhong dough is anywhere between 5% to 12% of the total flour in any yeasted bread recipe. Calculating the water or liquid amount is easy. Just multiply the weight of the flour by 5.
How to use tangzhong
Once the tangzhong is made, you just need to cover it and allow it to cool down to room temperature.
You then simply add it to the rest of the bread dough ingredients and knead together as per the recipe instructions.
Benefits of the Tangzhong Technique

The tangzhong roux or slurry absorbs, traps and retains more moisture. Because the tangzhong essentially locks in the liquids, less moisture is lost during baking.
This results in a bread with a lighter, fluffier crumb, and is what keeps the loaf soft and moist for longer.
And as surely as that must sound like music to our ears, there’s an added bonus to boot! It helps your loaf stay fresh for a longer time!

I’ve had this milk loaf sit on my counter in a sealed Ziploc for as long as four days. Amazingly, there wasn’t yet the slightest hint of it starting to go stale. Woohoo!
I don’t want to crack your head with the science behind the tangzhong method. But if you’re really interested to get those brain cells going, I’ve got some illuminating reads for you here and here.
Step-by-Step: How to Make Red Bean Milk Loaf using the Tangzhong Technique

Step 1: Make the tangzhong (roux)
This is the 5-minute step that’s going to transform your bread! Gently cook the flour-water mixture till it thickens to a pudding-like consistency.
Don’t overdo it! As you can see, I kind of did.
That’s what happens when I try to supervise the roux and manage a camera at the same time… aarrrgghh!
Just remember… like a pudding, not a starchy blob. It’ll turn out perfectly fine though, even if you went a little overboard.


Scrape out every bit of it with a spatula into a small bowl, and cover the surface with plastic wrap. We need it to cool to room temperature. I usually pop it into the chiller while I get on with the rest of the dough ingredients.
Step 2: Add the cooled tangzhong into the wet ingredients.
Okay, you ready for some hand whisking? In a larger mixing bowl, place the cooled tangzhong. Add the egg, whipping cream, and water, and whisk away! You’ll want to end up with a wet tangzhong mixture as lump free as possible.


Add the wet tangzhong to the rest of the dough ingredients.
Ready your stand mixer by fitting it with the dough hook. Place all the remaining dry ingredients (except the butter) in the mixer bowl. Pour in the wet tangzhong mixture.
Knead on low for about 1 minute, just to allow the wet and dry mixtures to start binding together. Then increase the speed to high, and knead until the dough comes together. You should see the sides of the bowl come clean. This may take about 3 to 5 minutes.


Once that happens, knead in the softened butter. At first, it’s going to look awful – you might even doubt that the dough is supposed to look like THAT. But stay with it, it’ll work out, I guarantee.
It will become messy, gooey and sticky as it works to incorporate the butter. But at the end of this process, it’ll be a happy union!
This may sometimes take 5 to 7 minutes. Eventually, you’ll be rewarded with a beautifully soft, smooth and elastic dough. Yayyy!


Just to be absolutely sure that the dough is ready for proofing, I always do the ‘windowpane’ test!
Grease your palms and fingers with some clean oil. Pull away a golf-sized blob of dough and gently stretch it by teasing it apart.
You’ll want to get a thin, continuous and translucent membrane, at least 5 to 6 cm (2 – 3 inches) wide. If you get holes as you stretch the dough, it’s okay so long as these tear in a circular fashion.

If the dough tears too quickly or feels tight, it means the gluten – the protein in the flour – isn’t developed enough. Stick the dough back with the rest in the mixer, and knead for another 2 to 3 minutes before trying again.
Step 3: Do the first proof (first rise).
Turn out the dough onto the counter top and gather into a smooth ball.
Lightly grease the base and up the sides of the same mixer bowl with some oil. Put the dough back in, rolling over once to grease the surface. Set aside, covered with a tea cloth, to prove for 40 minutes, or till the dough doubles in volume.


Having just said this, I do have a problem judging this at times. I basically have to eye-ball it. So, I prefer to do the finger poke test.
Stick your index finger into the centre of the dough, up to the middle joint. Pull out your finger, and if the dent remains, the first proof is done
Next, divide the dough into four equal portions. Round them into balls. Let the dough balls rest, covered, for 10 minutes. We’re basically allowing the gluten in the dough to relax a bit so that it’s much easier to shape it.


Now, we come to my absolute favourite part – shaping! Roll out each ball into a long, flat rectangle about 5-mm (¼-inch) thick.
Spread ¼ of the red bean filling over the surface of each dough. Roll it up like a Swiss roll.
Step 4. Do the second proof (final rise).
Place two rolls of red bean milk dough in each greased loaf pan. You can position the rolls with either the shorter end of the roll facing the short side of the pan, or facing the long side of the pan – I’ve done it both ways. Just ‘cos we can (chuckle).
Set aside to proof, covered with a tea cloth, for 50 minutes or until the dough has risen to ¾ of the height of the loaf tin.


Step 5. Ready the oven (in advance) and bake!
In the midst of all this, it can be all too easy to forget to preheat your oven! My oven takes about 20 minutes to reach 180°C (360°F) so I start preheating about 20 minutes before the final rise is done.
Place the filled loaf tins on a rack in the bottom half of your oven, but not on the lowest rack. Bake for 30 to 35 minutes until the tops turn a deep golden brown, and the loaves are baked through.
Remove the loaf tins from the oven. Brush the tops with melted butter. This softens the crust, and more because I’m after the lovely sheen that butter gives!
Run a knife around the sides of each tin, and release each red bean milk loaf immediately. Let the loaves cool on a rack.
Slice with a bread knife when the loaves are completely cool – you’ll get nice, even slices. Store in an air-tight container to retain freshness and prevent the loaf from drying out.

You may like these recipes:
- Dorayaki (どらやき) Japanese Red Bean Pancakes
- Soft & Moist Bakery-Style Butter Coconut Buns
- The Best Cinnamon Rolls {Extra Moist, Soft, and Fluffy}
- Pandan Raisin Bread
- English Cottage Bread
Tried this recipe? I’d love to see! Remember to share your pics on Instagram and tag @foodelicacy or #foodelicacy.
Pin this Recipe!

Ingredients
For the tangzhong starter dough:
- 25 g bread flour
- 125 g milk
For the main dough:
- 475 g bread flour
- 8 g 1 tbsp active dry or instant yeast
- 60 g sugar
- 6 g 1 tsp salt
- 1 cold egg
- 85 g cold water
- 100 g cold whipping cream
- 40 g butter softened at room temperature
For filling:
- 200 g canned whole red beans preferably Japanese red adzuki beans
For topping:
- 1 tbsp melted butter optional
Instructions
Make tangzhong (roux):
- In a small saucepan, whisk together bread flour and milk until no lumps remain. Set the saucepan over medium heat.
- Cook gently, stirring continuously, until the mixture starts to thicken to a pudding-like consistency, about 3 to 5 minutes. Be careful not to overcook it! The roux is ready once the whisk/spatula leaves drag lines on the base of the pan, or when an instant-read thermometer reaches 65°C (149°F).
- Scoop the roux into a small bowl. Cover with plastic wrap directly on the surface of the roux. Cool to room temperature (or cool in the chiller).
Make the main dough:
- Grease the base and sides of 2 loaf tins measuring 20 x 10 x 10 cm (or similar sized loaf pans).
- In a medium mixing bowl which can hold at least 2 cups of liquid, place the cooled tangzhong dough. Add the egg, water and whipping cream, and stir vigorously with a whisk until free of lumps and well incorporated.
- In the mixer bowl of a stand mixer, combine bread flour, yeast, sugar and salt. Stir with a whisk to combine well. Pour in the tangzhong dough mixture. Start the mixer fitted with a dough hook, on low speed for one minute to allow the ingredients to come together.
- Increase mixer speed to medium-high, and continue to knead until the dry and wet dough mixtures come together and form a rough dough. Knead until the dough cleans the sides of the bowl (referred to as pick up stage), about 3 to 5 minutes depending on the mixer speed.
- Add the butter. Continue to knead until the butter is fully incorporated into the dough and the sides of the bowl come clean once more, and the dough is now smooth and elastic, about 5 to 7 minutes. Test for the ‘windowpane’ (see explanatory notes below).
Do the first proof (first rise):
- Once ‘windowpane’ is achieved, turn out the dough onto the counter top and gather into a smooth ball. Lightly grease the base and up the sides of the same mixer bowl with some oil.Put the dough back in, rolling over once to grease the surface. Set aside, covered with a tea cloth, to proof for 40 minutes, or until the dough has doubled in volume.
- Weigh the dough and divide equally into 4 portions. Round each dough portion into a ball and let rest for 10 minutes.
Do the second proof (final rise):
- Roll out each ball into a long, flat rectangle about 5-mm (¼-inch) thick. Spread ¼ of the red bean filling over the surface of each dough. Roll it up like a Swiss roll.
- Place two rolls of dough in each loaf pan. You can position the rolls with either the shorter end of the roll facing the short side of the pan, or facing the long side of the pan (see pictures above) – I’ve done it both ways.
- Set aside to proof, covered with a tea cloth, for 50 minutes or until the dough has risen to ¾ of the height of the loaf tin.
Preheat the oven and bake:
- When the dough is almost ready after the second proof, start preheating the oven until the temperature reaches 180°C (360°F). Bake for 30 to 35 minutes until the tops turn a deep golden brown and the loaves are baked through.
- Remove the loaf tins from the oven. Brush the tops with melted butter (optional). Run a knife around the sides of each tin, and release the bread loaves immediately onto a cooling rack. Allow to cool completely to room temperature before slicing or storing.
Notes
- The ‘Windowpane Test’ is done to check if the gluten in the dough is sufficiently developed. To do this, lightly grease your fingers and palms on both hands with some clean oil. Lop off a small portion of dough, roughly the size of a golf ball.
- Gently tease and stretch the dough until you get a thin, continuous and translucent membrane (see photo above). You’ll want to be able to get a stretch at least 5 to 6 cm (2 – 3 inches) wide.
- If you get holes as you stretch the dough, it’s okay so long as these tear in a circular fashion. If it tears too quickly or feels tight, it means the gluten isn’t developed enough.
- If this happens, stick the dough back with the rest in the mixer, and knead for another 2 to 3 minutes, before doing the test again. Keep repeating until you get the ‘windowpane’.


